As tempting as it may be to dive into your glossy tub of paint with your shiny new paint brush, there are a number of things that should be considered to ensure that you avoid making common painting mistakes that could be detrimental to the entire decorating process.
Below, Cawarden Brick & Tile Company have offered 4 common painting mistakes inadvertently executed by thousands of decorating novices across the country, and provided expert painting tips to make sure that your upcoming painting project goes off without a hitch!
1. Foregoing the preparation stage
Many choose to make the common painting mistake of choosing not to prep the room before putting the paint to the wall.
2. Picking the wrong paint for the project
So, you’ve fallen in love with a particular colour and can't wait to apply it to your walls to enhance your interior! Don’t be too hasty - it’s wholly worth finding out which solution will offer the best results for your project.
Interior paint types include:
Do not hesitate to consult with a paint specialist at your nearest DIY store - whether you’re painting reclaimed furniture or giving your interior a complete make-over, they will be able to advise which paint solution is best.
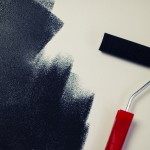
3. Not utilising a variety of paint brushes
Choosing a bog-standard paintbrush many not be appropriate for your particular project needs. Generally, having at least two different styles of paintbrush will offer enough variety to get the job done. You many need to shell out slightly more for a high quality paintbrush, but it’s worth it - higher quality painting equipment will offer a better, longer-lasting finish and will be more time efficient. Your choice of brush will also depend on your paint solution, and House-Painting-Info offer a comprehensive article that will help you decipher which brush is best for your imminent painting project!
4. Not having patience
Nothing beats the first coat of paint - watching the new paint cover the old colour and immediately rejuvenating the look of the room. However, upon completion of the first coat, patience is key to ensuring that your first paint fully dries before applying the second coat. If the second coat is painted on too quickly, issues such as visible paint streaks or air bubbles could arise and ruin the appearance and finish of the job. As one of the most common painting mistakes, this can be solved simply by taking a break and waiting around 24 hours until taking a second coat to the furniture piece or wall you are painting.
Here at Cawarden Brick & Tile Company, we wholly advocate utilising your DIY skills to enhance your interior, whether it be utilising our expert painting tips or fitting our reclaimed furniture into your home. If you’d like to visit our Rugeley Reclamation Centre and would prefer to speak to a member of the Cawarden team prior to a visit, please do not hesitate to call 01889 574066 at your earliest convenience!